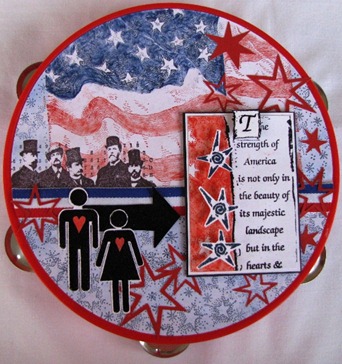
 Have you seen the silhouette image of three children marching in what looks like an improvised parade? If so, you may understand why a red plastic tambourine reminds me of a July 4th celebration. I've seen the image on July 4th T-shirts, and it's always reminded me of childhood days when I marched in the kindergarten "rhythm band." In an era of electronic gadgetry, it may be difficult to imagine the pleasure that children derived in playing simple instruments such as a triangle or wooden blocks and the coveted noisemaker that led our "parades," the tambourine.
The tambourine will always signify celebration in my mind, a perfect backdrop for this ATC featured on pages 82 - 83 in the August 2011 issue of Crafts 'n things. It celebrates the "Strength of America" that is found "in the hearts and souls of its people." (Strength of America stamp from Art Impressions; flag stamp from Rubber Monger)
This artist trading card provides further reminder of the roots of our nation. It brought a little smile to my face to use the Top Hat image from the English PaperArtsy™ company to represent our forefathers.
Have you seen the silhouette image of three children marching in what looks like an improvised parade? If so, you may understand why a red plastic tambourine reminds me of a July 4th celebration. I've seen the image on July 4th T-shirts, and it's always reminded me of childhood days when I marched in the kindergarten "rhythm band." In an era of electronic gadgetry, it may be difficult to imagine the pleasure that children derived in playing simple instruments such as a triangle or wooden blocks and the coveted noisemaker that led our "parades," the tambourine.
The tambourine will always signify celebration in my mind, a perfect backdrop for this ATC featured on pages 82 - 83 in the August 2011 issue of Crafts 'n things. It celebrates the "Strength of America" that is found "in the hearts and souls of its people." (Strength of America stamp from Art Impressions; flag stamp from Rubber Monger)
This artist trading card provides further reminder of the roots of our nation. It brought a little smile to my face to use the Top Hat image from the English PaperArtsy™ company to represent our forefathers.
 Ink up to create a red, white, and blue party to honor the birth of a nation! You'll find all the color you need with Ranger® Adirondack® pigment and dye inks.
Wedding plans were already underway at my house, so I knew that I couldn't resist this "Happy Couple" by Judikins, You'll find two very different looks using this stamp in the April 2010 issue of Crafts 'n Things. Can you tell what product these two projects have in common?

 If you guessed Tim Holtz™ Adirondack® Alcohol Inks, you're right. The metallic finish of the Silver Fanfare die cut paper (Creative Imaginations) on the card front provided a great surface for the alcohol ink and for embossing with Adirondack® Pigment Ink and black Super Fine Detail™ Powder. I love the way the pattern of the paper is visible in the unembossed areas.
The keepsake box is made using ArtEmboss Aluminum by Amaco, but you'll have to check pages 38 - 39 for details on the tools I used (as well as a much better picture!) When you do, you'll be in for a surprise, and I think you'll want to give this a try too!
If you guessed Tim Holtz™ Adirondack® Alcohol Inks, you're right. The metallic finish of the Silver Fanfare die cut paper (Creative Imaginations) on the card front provided a great surface for the alcohol ink and for embossing with Adirondack® Pigment Ink and black Super Fine Detail™ Powder. I love the way the pattern of the paper is visible in the unembossed areas.
The keepsake box is made using ArtEmboss Aluminum by Amaco, but you'll have to check pages 38 - 39 for details on the tools I used (as well as a much better picture!) When you do, you'll be in for a surprise, and I think you'll want to give this a try too!
This was a first for me. I finally decided to take the challenge to submit a couple of projects for the 30 Minute Card Ideas section of Crafts 'n Things. Both these projects as well as other quick creations can be found on page 63 of the February 2010 issue. The "Love Tag" employs one of my favorite color combinations, black and white with a punch of red. The elegant paper from DCWV and paper sticker made this a quick go together. (Instructions here.) 
For a totally different look, try my "Love Poste." The postage collage stamp (Dawn Hauser™ for Inkadinkado®) made this another easy project. Pop dots and Inkssentials™ Glossy Accents™ give added dimension to the butterfly postage. Of course I've used my favorite Adirondack® inks. (Instructions here.) 
The instructions for these projects and many more are available at craftsnthings.com. (Look under the drop down menu for the "Free Stuff" tab.) You'll find hours of inspiration as well as close-ups of these projects.
You may have thought of masking tape as a standard artist supply, but have you considered using it to create your backgrounds? Look at these two cards from my Better Backgrounds column in the June 2009 issue of Crafts ‘n Things.
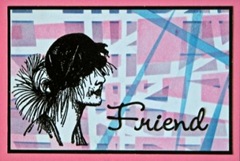
 At first glance, I think you’d be hard pressed to say how these backgrounds were created. Tape and Adirondack® Dye Ink pads are the answer. The details are on pages 92-93.
The two great stamps, Sherrie and Sharon, by B Line Designs were stamped with a Big & Bossy™ Two-tone Embossing Pad and embossed with Super Fine Detail™ Powder. (You could achieve the same result with the newer Adirondack® Pigment Inks.) This is also a perfect background for rub-ons as demonstrated by the addition of “thanks” (Creative Imaginations) to the card stamped with Sharon’s veiled image.
Here’s an example with colors that do not overlap. (Stamps: Time Flies, Stampers Anonymous; Eternity Slab, Postmodern Design. Nick Bantock™ Dye Pads: Chartreuse, Deep Turquoise, Vermillion Lacquer, Damson Plum, Chrome Yellow.)
At first glance, I think you’d be hard pressed to say how these backgrounds were created. Tape and Adirondack® Dye Ink pads are the answer. The details are on pages 92-93.
The two great stamps, Sherrie and Sharon, by B Line Designs were stamped with a Big & Bossy™ Two-tone Embossing Pad and embossed with Super Fine Detail™ Powder. (You could achieve the same result with the newer Adirondack® Pigment Inks.) This is also a perfect background for rub-ons as demonstrated by the addition of “thanks” (Creative Imaginations) to the card stamped with Sharon’s veiled image.
Here’s an example with colors that do not overlap. (Stamps: Time Flies, Stampers Anonymous; Eternity Slab, Postmodern Design. Nick Bantock™ Dye Pads: Chartreuse, Deep Turquoise, Vermillion Lacquer, Damson Plum, Chrome Yellow.)
 For a completely different look, tear your tape to create the shape of your choice. After creating the grid background with tape and Clover Adirondack® Dye Ink, I added the flower effect with tape and Wild Plum ink. (Stamp: Printer’s Mark, LaPluma; Big & Bossy™ Two-tone Embossing Pad; Bottle Adirondack® Embossing Powder.)
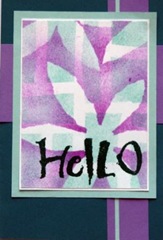 Want to try something different? Let your tape be your guide!


