Showing posts with label Perfect Pearls. Show all posts

April 18, 2011

30 Minute Card Ideas: Butterfly Silhouette Tag

When I look at this tag, I feel like belting out a line from a Julie Andrus number in The Sound of Music: "These are a few of my favorite things." What could make it any better for a stamper than Tim Holtz™ Distress Inks and a great collage image? Only sparkle, and there's lots of it in this tag published on page 73 in the April 2011 issue of Crafts 'n things®. Black Sparkle embossing powder, Sparkle Sunflower Perfect Pearls™, Suze Weinberg's Beadazzles™, lots of Tim Holtz™ Distress™ inks, Stickles™ Glitter Glue, and of course Inkssentials™ Glossy Accents™.
2011 04 LRoberts 30 Minute Butterfly & Flowers Tag

As always, the instructions for 30 Minute projects are online. You can find the details here.

January 10, 2011

Exploring Image Transfers: Tape Transformation

Do you remember the first time that you saw heat embossing? It’s still a moment of wonder for me. I had a similar experience years ago when I first watched a demonstration of packing tape transfers. Now, when I share this technique, the reaction is always the same. People can’t believe that the process is so simple. I have to agree.
These projects are the first in a series of three articles on image transfers for Crafts 'n things®. First, a card featuring a stamp by Impression Obsession, Inc. , Hopes & Dreams. Perfect Pearls™ always provide an elegant touch.
2011 02 LRoberts Exploring Image Transfers Hopes & Dreams Card

Below, you'll find a necklace featuring patterned paper by DCWV and stamps by Hero Arts®, Manuscript Background and a simple heart. (The Hearts Ink and Stamp Set. is no longer listed, but a similar stamp is available in the From the Heart set.) I'm not a jewelry maker by any means, but this is a project that anyone could complete.

2011 02 LRoberts Exploring Image Transfers Beaded Heart Necklace

Want to know more? Pull out your "inky" supplies: Inkssentials™ Gloss Paper; Archival™ Ink; Adirondack® Acrylic Paint Dabbers; Adirondack® Dye Ink Pads; Adirondack® Pigment Inks. You'll find the details on page 50 of the February 2011 issue.

October 17, 2010

Better Backgrounds: Perfectly Dramatic Black

If you like to create fabulous backgrounds with a simple list of supplies, the technique in the December 2010 issue of Crafts 'n things® is for you! The first card uses little more than black Inkssentials™ Gloss Paper and Perfect Pearls™.
2010 12 LRoberts Better Backgrounds Basic Black Card
Want more bling? Just add "Glitter Ornaments" Peel-Off Stickers from The Paper Studio.
2010 12 LRoberts Better Backgrounds Ornament Card
You'll find complete instructions on page 71.

December 19, 2009

Faux Metal Embellishments

Looking for sophisticated but budget friendly embellishments? You'll want to check out pages 84-85 of the February 2010 issue of Crafts 'n Things for striking examples.
At first glance, you'll think that these projects are adorned with pricey metals and their lightness may cause slight confusion. The foundation is simple and one that is in the supply closet of many paper crafters. The secret is Perfect Pearls™ and great die cuts by Spellbinders.
The first of my projects is this "Key to My Heart" card. The Distressed Floral background (Tim Holtz™ Collection, Stampers Anonymous) provides a lovely back drop for the lock and key. Both glisten in the light like the real thing.
10 02 Lynn Roberts Perfect Pearls Faux Metal Card
Next, my "Illuminata Tag." The rusted effect of the die cut is the perfect enhancement for the classic Illuminata stamp (Inkadinkado®).True sophistication.
10 02 Lynn Roberts Perfect Pearls Faux Metal Tag
Last, but by no means least, a "Regal ATC" featuring Tim Holtz Creative Block #25 (Tim Holtz™ Collection, Stampers Anonymous.) The green patina seems to ooze from the flourish and fleur-de-lis just as it would from the real thing.
10 02 Lynn Roberts Perfect Pearls Faux Metal ATC
If you have never tried Perfect Pearls™, I hope these projects will encourage you to add them to your supply stash. Whether you want to include a sparkle of glitz or the impression of aged metal, you'll find a them "perfect" fit for your needs.

September 27, 2009

Better Backgrounds: Swirling Texture

Texture never bores me, and when you add the glimmer of Perfect Pearls™ to Inkssentials™ Glossy Accents™, you can create a background that is unforgettable. You'll find the details of this technique in the October 2009 issue of Crafts 'n Things. The two cards featured on page 112 are below.
First, the Believe card demonstrates the results you can achieve through an underlying layer of stamping. The stamps are two of my favorites: Block of Words (Postmodern Design) and Cracks Grunge Background (I Brake for Stamps).
2009 10 LRoberts Better Backgrounds Believe Card
Next, see the results you can achieve by adding simple embellishments like rick rack and this flower from K&Company.
2009 10 LRoberts Better Backgrounds Shimmering Flower Card
Here are two additional cards. The first card demonstrates the dramatic results you can achieve with no added embellishments while Queen of the Road is (stickers by EK Success) is just plain fun.
2009 10 LRoberts Better Backgrounds Simply Swirls Card

2009 10 LRoberts Better Backgrounds Queen of the Road Card
You don't have to jump on your Harley to create these backgrounds.The right products are all you will need to fire up your imagination.`

July 5, 2009

Altered Paper Mache Pair

I might as well admit it before someone asks.
No, the "Fairyland" box and the close-up of the lid are not the same. I thought it was packed carefully, but the elephant that must have stomped on the box crushed the wings on my precious fairy. I only redid the lid, and it turned out a little differently from, my original submission. To find pictures that match, you'll need to look in the August issue of Crafts 'n Things. Here's the original box.
2009 08 Lynn Roberts Mold n Pour fairyland box
Now for a closer view. Actually, I think that I like the new lid better than the first. (Next time that I go to the post office, I'll have to thank that elephant!) I never cease to be amazed at how simple charms and buttons can be used with Melt Art™ Mold-n-Pour® to form a mold for Ultra Thick Embossing Enamel™. I added highlights with Perfect Pearls™ and Stickles™ Glitter Glue.
2009 08 Lynn Roberts Mold n Pour fairland box top
My second altered paper Mache creation was this "Dragonfly Delight" box. Look closely and what appear to be openings in the metal lid are actually cut-outs lined with mesh wire. Coordinating colors of Tim Holtz™ Adirondack® Alcohol Inks, Adirondack® Acrylic Paint Dabbers, and Adirondack® Pigment Inks made this a quick and easy project to finish. If you're wondering about the texture on the sides of the box, that's one of my favorite stamps, the bark stamp from the Grunge Background set by I Brake for Stamps.
09 08 LRoberts Dragonfly Box
You can find complete directions for these projects on page 90 in the August issue of Crafts 'n Things.


April 26, 2009

Fanciful Wings Project Set

I love a bargain and regularly shop the aisles of the local dollar store for crafting inspiration. When I found these glow in the dark butterflies, my mind began to race. These four projects, featured in the June 2009 issue of Crafts 'n Things, were the result.
I think that my favorite is this embossed card using Nick Bantock™ Dye Pads. I wish that you could see the beautiful sheen that the Perfect Pearls™ provide.
LRoberts Glo Butterflies Fanciful Wings Embossed Card

Here I’ve used Tim Holtz™ Adirondack® Color Wash™ for a really easy card. Such rich colors.
LRoberts Glo Butterflies Fluttering Flight Card 

With added color from Adirondack® Dye Ink Pads, Color Wash™ clean-up from the card above was the foundation for this journal. Below, you can see how I incorporated mulberry paper to finish the inside cover.
LRoberts Glo Butterflies Second Impressions Journal Cover LRoberts Glo Butterflies Second Impressions Journal Inside
I found one more use for Color Wash™ in this butterfly paper casting.
LRoberts Glo Butterflies Paper Casting Card 
Details for constructing these cards are on pages 98-99. With a little imagination, I’m sure you’ll think of other uses for this inexpensive find.

March 15, 2009

Step Up Your Stamping with Foam Stamps

In the December 2008 issue of Crafts ‘n Things, I had two projects using foam stamps: the first, a tray in which a large stylized leaf and a circle stamp were turned into vibrant poinsettias, and the second, a set of holiday cards. In the April 2009 issue, you’ll find four more cards that prove that foam stamps can be sophisticated or just plain fun.
Once again, I’ve used some of my favorite supplies – Adirondack® Acrylic Paint Dabbers (and Adirondack® Metallics Acrylic Paint Dabbers,) Adirondack® Dye Ink Pads, Perfect Pearls™, and Stickles™ Glitter Glue. The foam stamp transformation is made complete with an Inkssentials™ White Opaque Pen and a black pen (Pitt Artist.) For more information on how to “Step Up Your Stamping with Foam Stamps,” check out my article on pages 78 – 79, and you too will join the glitz, glitter craze!
Lynn Roberts Foam Stamp Flowers
Lynn Roberts Foam Stamp Butterfly
Lynn Roberts Foam Stamp Bud
Lynn Roberts Foam Stamp Frog

October 5, 2008

A Matter of Imagination

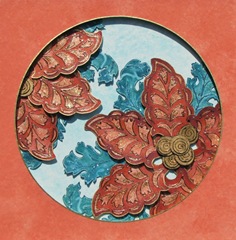
The tray had been a fixture on our porch for years, and the once rich finish showed the effects of constant exposure to the elements. When Crafts 'n Things editor Dawn Gehring suggested a Christmas home decor project, I knew this was the perfect project to repurpose a favorite piece. You'll have to check the December 2008 issue to see the tray itself, but a few swipes of Espresso paint with an Adirondack® Acrylic Paint Dabber gave the tray new life.
I envisioned big, bold flowers and leaves. Since the poinsettia stamps that I had on hand were not the size that I wanted, I turned to large foam leaf and circle stamps to create the images that I envisioned. As with the foam stamp Christmas cards, I used Adirondack® Acrylic Paint Dabbers and Adirondack® Metallic Acrylic Paint Dabbers to mix my paints right on the stamps. I believe I achieved the bold look that I had in mind!
Lynn Roberts 01 Foam Stamp Poinsettia Tray
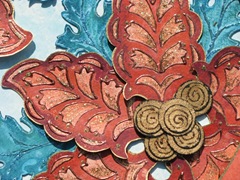
Now for a closer look. When I think of Christmas, I think of glitter and glitz, and the fun part of the project was adding those details. Adirondack® Dimensional Pearls, Stickles™ Glitter Glue, and Perfect Pearls™ pack a glamour punch and the Inkssentials™ White Opaque Pen adds subtle accents.
Lynn Roberts 02 Foam Stamp Poinsettia Detail

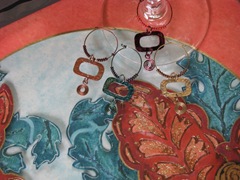
As for the glass charms, Tim Holtz™ Adirondack® Alcohol Inks and Metallic Mixatives quickly transformed jewelry findings into coordinating pieces. Rather sophisticated if I do say so.
Lynn Roberts Tray and Glass Charms
For additional details, see pages 52-53 in the December 2008 issue of Crafts 'n Things.

Foam Stamp Transformations

What comes to mind when you think of foam stamps? Simple? Plain? Country? Not any more. These three cards, featured in the December 2008 issue of Crafts 'n Things, prove that great products can change the effect from the look of a chunky stencil to one of sophistication, glamour, or just plain fun!
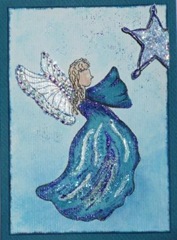
What could be easier than mixing colors on your stamp with Adirondack® Acrylic Paint Dabbers or Adirondack® Metallics Acrylic Paint Dabbers.
Lynn Roberts 10 Foam Stamp Angel Seeking Star
Stickles™ Glitter Glue, Liquid Pearls™, Adirondack® Dimensional Pearls, and Perfect Pearls™ can provide real pizzazz.
Lynn Roberts 20 Foam Stamp 'O Christmas Tree
I used an Inkssentials™ White Opaque and a black pen (Pitt Artist) to add detail to continue the transformation.
Lynn Roberts 30 Foam Stamp Snow Bird

No chunky stencil look here. For additional tips, see pages 88-89 in the December 2008 issue of Crafts 'n Things.

June 22, 2008

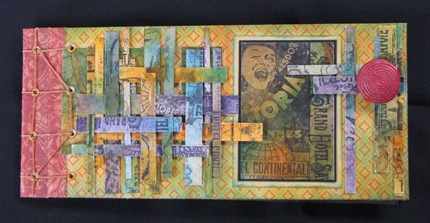
Hotel Labels ATC Album

I like to make books but rarely use them. Generally for me, it's the process rather than the outcome, so this is a change: a project I'm really using. I've been looking forward to its publication in the August 2008 issue of Crafts 'n Things so that I could share detailed pictures.
1 Lynn Roberts Hotel ATC Album
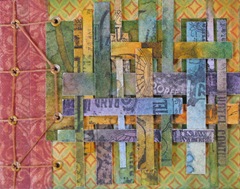
With patterned paper as a foundation for the cover (Bo-Bunny Press Shabby Princess Collection,) take a closer look at this twist on a traditional book binding technique.
2 Lynn Roberts Hotel ATC Album Binding
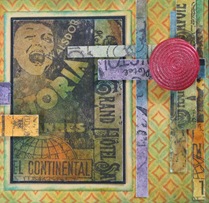
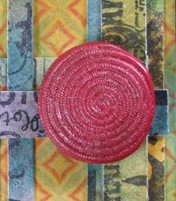
The ATCs on the cover and inside used one stamp, the Tim Holtz Hotel Collage (Stampers Anonymous.) Of course, I used some of my favorite Ranger products: Adirondack® Color Wash™, Tim Holtz™ Distress Ink Pads, and Archival™ Ink. I used Melt Art™ Mold n' Pour™, my Melting Pot®, Melt Art™ UTEE Brightz™, and Perfect Pearls™ to create the fuchsia embellishment. I think this is the perfect touch.
3 Lynn Roberts Hotel ATC Album ATC 4 Lynn Roberts Hotel ATC Embellishment
Inside the book, you'll find a dozen ATCs made with the same stamp. (I find it a challenge to navigate the Stampers Anonymous catalog. Check out page 9 in the Winter 2008 Supplement 8.2 to see how versatile the image is.)
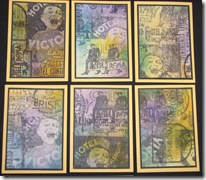
5 Lynn Roberts Hotel Stamp ATCs 1
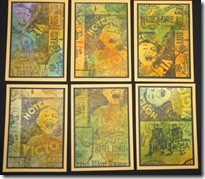
6 Lynn Roberts Hotel Stamp ATCs 2
For detailed instructions, check out the August 2008 issue of Crafts 'n Things.

May 18, 2008

Cherish This ATC Holder

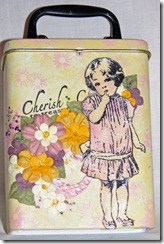
If you agreed with my "gaudy cute" assessment of the glitzy orange and purple ATC holder in the prior post, I'm sure that you'll find "Betty" one of the sweetest little girls you've ever seen. ("Betty" and the "Cherish" sentiment are both stamps by B Line Designs.) This tin was a featured ATC holder in the April 2008 issue of Crafts 'n Things.

Cherish ATCs 1
Check out the details on page 65 of how I used Adirondack Acrylic Paint Dabbers, Adirondack Dye Ink Pads, Stickles Glitter Glue, Inkssentials Crackle Accents, Perfect Pearls, and Suze Weinberg's Beadazzles to make one sweet container for your ATCs.

March 30, 2008

But It Didn't Start Out That Way . . . . . Subtitle: How does frilly turn vintage?

Yesterday, I was working away on the computer when the lightening started. When you've experienced fried television sets and VCR's, it's easier to shut things down and unplug than to try to remember where the warranties are for the surge protectors.
I planned to return to the computer when the storm passed, so I didn't want to begin a major project. I decided that decorating the plain chipboard notebook I'd found earlier in the week in the dollar bin at Walgreen's would be a fun afternoon project. This is where I began.

My initial thought was to make something girly, a cute notebook for my purse. After a plain coat of gesso, I decided to add texture and depth with the next coat. An old credit card, punchinello, and plastic mesh were perfect tools.
While I was waiting for the gesso to dry, I ran across a package of beautiful embossed paper napkins that I'd purchased from Tuesday Morning at the outrageous price of $3.49 for the package of twelve. I rationalized that they were from Germany and that I might actually use the leaf embossed napkins for a special lunch. I decided to limit that future luncheon to eleven people as I pulled out one for my project.
My first thought was to add a small piece of the napkin along one side of the front, but the leaf design seemed to be absorbed by the matte medium. I realized that it would take several layers to build a base for the embossed leaves. There went all that great texture that I'd gessoed on the front.
These leaves were elegant, and I still envisioned a delicate notebook. I pulled out the new Sandy Smith owl that I'd bought earlier this week and the "to teach" stamp (Anita's) that I've always found an inspiration. I stamped the images on white tissue with Ranger Jet Black Archival Ink and layered them atop the napkins.
Although I realized that my notebook would no longer have a frilly look to it, I still envisioned an elegant style. That was before I started slobbering on the Ranger Distress Inks. I don't know how it happens. Even when I intend to create a project that is bright and cheery, my projects take a vintage turn. It's not what I intended, but what a great result. My 2/$1.00 notebook has the look of worn, expensive leather.

A couple of things that I should confess: First, I forgot to cover the vinyl-like edging when I sprayed the covers with a matte sealer. My favorite solution for a sticky surface is application of Perfect Pearls. Having used a heavy hand with the Distress Inks, I touched up the saying and the owl with a Faber-Castell Pitt pen.
Back to the title of this post. Where did I go wrong? No matter how hard I try to do cute, I usually end up in the world of grunge. I think it's just my style!

March 29, 2008

Scrapperdashery Color

Yesterday, my work had a vintage feel - so easy to accomplish with Scapperdashery papers. Today, I want to show how those same papers can be used for updated playful projects.
I love this little "purse" notebook, a dollar store find. Simply ink the edges of the patterned paper with your favorite Ranger Distress Ink, and your background is complete. I added black ribbon to the "handle" for a little punch. The flower and dragonfy images were made by stamping Ranger's Jet Black Archival Ink on shrink plastic with a light application of Perfect Pearls for a punch of color. Done!


Here's another project where I stamped directly on Scrapperdashery patterned paper. I added black ric rac and the letters and arrow (QuicKutz) to this fun Paula Best image, and my project was complete. Now, just because you have a cute little recipe tin, it doesn't mean that you have to cook!

The picture that I was working with was definitely lacking, so I decided to color the dress with Ranger's Distress Ink. I stenciled "BABY" onto the paper and added a few other finds from my scrap basket. I'm keeping this project in mind for the next time that I want to create a personalized baby gift.