I might as well admit it before someone asks.
No, the "Fairyland" box and the close-up of the lid are not the same. I thought it was packed carefully, but the elephant that must have stomped on the box crushed the wings on my precious fairy. I only redid the lid, and it turned out a little differently from, my original submission. To find pictures that match, you'll need to look in the August issue of Crafts 'n Things. Here's the original box.
 Now for a closer view. Actually, I think that I like the new lid better than the first. (Next time that I go to the post office, I'll have to thank that elephant!) I never cease to be amazed at how simple charms and buttons can be used with Melt Art™ Mold-n-Pour® to form a mold for Ultra Thick Embossing Enamel™. I added highlights with Perfect Pearls™ and Stickles™ Glitter Glue.
 My second altered paper Mache creation was this "Dragonfly Delight" box. Look closely and what appear to be openings in the metal lid are actually cut-outs lined with mesh wire. Coordinating colors of Tim Holtz™ Adirondack® Alcohol Inks, Adirondack® Acrylic Paint Dabbers, and Adirondack® Pigment Inks made this a quick and easy project to finish. If you're wondering about the texture on the sides of the box, that's one of my favorite stamps, the bark stamp from the Grunge Background set by I Brake for Stamps.
 You can find complete directions for these projects on page 90 in the August issue of Crafts 'n Things.
Who hasn’t heard of the edgy English stamp company Paper Artsy. It’s hard for me to believe that it’s been almost five years since I first met Leandra Franich at CHA. The next year she would return as an exhibitor, and the stamping world has not been the same since.
Leandra was also a fellow “graduate” of Ranger University. In a weekend that was a whir of tips and techniques, I was fascinated with Leandra’s work and her use of Ranger products.
You may be wondering about the connection between Paper Artsy and the title of this post. When I began to consider projects for the February 2009 issue of Crafts ‘n Things, I wanted to create sophisticated non-traditional Valentines. Leandra’s Penny Plates came to mind and the results are below. No lace or frills here, but I think my Valentine will definitely “think happy thoughts” when he sees this!
 I’m sure that my dear one will be also be interested in the “Bank of True Love.” Hugs and kisses are bound to result from the X’s and O’s on this card! (Stamps: Love Collage - Tim Holtz™ Collection, Stampers Anonymous page 146); Harlequin Diamonds - Postmodern Design) Check the February issue, pages 68 – 69, for detailed instructions for both these cards.
 The cards below also use the Melting Pot®, Melt Art™ UTEE Brightz™ Fuchsia, and Melt Art™ UTEE Flex™. You’ll find complete directions for them at Crafts ‘n Things as well as tips for using your Melting Pot®. (If you have not joined the Crafts 'n Things community, you'll find access to bonus projects and lots of "free stuff" by simply providing your email address. Sign up and get ready for hours of exploration!)
 Stamp (Hero Arts): Fancy Love
 Stamps (Tim Holtz™ Collection, Stampers Anonymous): True Friendship, Scribble Heart
I like to make books but rarely use them. Generally for me, it's the process rather than the outcome, so this is a change: a project I'm really using. I've been looking forward to its publication in the August 2008 issue of Crafts 'n Things so that I could share detailed pictures.
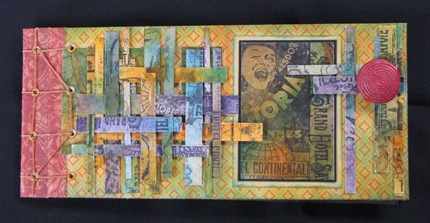 With patterned paper as a foundation for the cover (Bo-Bunny Press Shabby Princess Collection,) take a closer look at this twist on a traditional book binding technique.
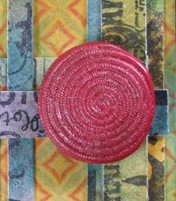
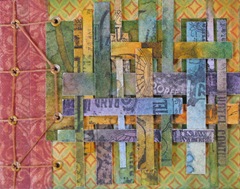 The ATCs on the cover and inside used one stamp, the Tim Holtz Hotel Collage (Stampers Anonymous.) Of course, I used some of my favorite Ranger products: Adirondack® Color Wash™, Tim Holtz™ Distress Ink Pads, and Archival™ Ink. I used Melt Art™ Mold n' Pour™, my Melting Pot®, Melt Art™ UTEE Brightz™, and Perfect Pearls™ to create the fuchsia embellishment. I think this is the perfect touch.
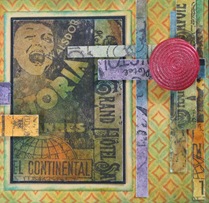
 Inside the book, you'll find a dozen ATCs made with the same stamp. (I find it a challenge to navigate the Stampers Anonymous catalog. Check out page 9 in the Winter 2008 Supplement 8.2 to see how versatile the image is.)
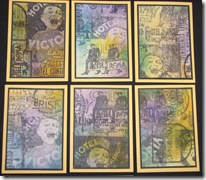
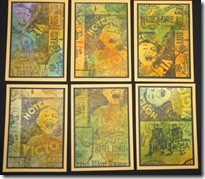 For detailed instructions, check out the August 2008 issue of Crafts 'n Things.


