I love the Oxford Impressions stamps: The Deep, Steampunk Works, and Steampunk Elements. This was a simple transformation with Claudine Hellmuth Studio products, Tim Holtz™ Adirondack® Color Wash, and Archival™ ink. You'll find the details on pages 96 - 97 of the August 2011 issue of Crafts 'n things.
Showing posts with label Adirondack Color Wash. Show all posts
July 23, 2011
Steampunk Treasures
I felt like I'd found buried treasure when I discovered this faux leather backgammon set at the thrift store for only $1.00. I knew that I wanted to use steampunk images to decorate the exterior, but the brown surface had to go. Thus began my experiment with materials that generally are not compatible with a synthetic surface, but perseverance and a light hand created the results I was seeking. I love finding inspiration at a bargain price. Here are the results.


I love the Oxford Impressions stamps: The Deep, Steampunk Works, and Steampunk Elements. This was a simple transformation with Claudine Hellmuth Studio products, Tim Holtz™ Adirondack® Color Wash, and Archival™ ink. You'll find the details on pages 96 - 97 of the August 2011 issue of Crafts 'n things.
June 16, 2010
30 Minute Card Ideas: Palm Trees and Cowgirls
My submissions for 30 Minute Ideas in the August 2010 issue of Crafts 'n Things share little in common other than stamps from Oxford Impressions. That's one thing I enjoy - the opportunity to create without the constraint of a particular theme. Another plus is that the instructions are provided on the Crafts 'n Things site. It's probably no surprise that both projects feature Ranger® products.
My first project is a "Palm Tree" tag on page 59. The stamp is from the Travel Journal plate. Color is provided by a variety of Tim Holtz™ products: Adirondack® Color Wash™, Distress Ink Pads, Distress™ Embossing Powders, and Adirondack® Alcohol Inks.You can find the instructions and an even larger photo here.
The "Always Gets My Man" card (stamp from the Cowgirl Blues plate) is a definite contrast to the tropical tag. Archival™ Ink is a standard ink for many stampers, but are you aware of the fabulous colors beyond Jet Black? The cobalt ink used here is definitely rich with coloring is provided by Tim Holtz™ Distress Ink Pads. You'll find the card on page 58, and the instructions are here.
My first project is a "Palm Tree" tag on page 59. The stamp is from the Travel Journal plate. Color is provided by a variety of Tim Holtz™ products: Adirondack® Color Wash™, Distress Ink Pads, Distress™ Embossing Powders, and Adirondack® Alcohol Inks.You can find the instructions and an even larger photo here.
The "Always Gets My Man" card (stamp from the Cowgirl Blues plate) is a definite contrast to the tropical tag. Archival™ Ink is a standard ink for many stampers, but are you aware of the fabulous colors beyond Jet Black? The cobalt ink used here is definitely rich with coloring is provided by Tim Holtz™ Distress Ink Pads. You'll find the card on page 58, and the instructions are here.
April 26, 2009
Fanciful Wings Project Set
I love a bargain and regularly shop the aisles of the local dollar store for crafting inspiration. When I found these glow in the dark butterflies, my mind began to race. These four projects, featured in the June 2009 issue of Crafts 'n Things, were the result.
I think that my favorite is this embossed card using Nick Bantock™ Dye Pads. I wish that you could see the beautiful sheen that the Perfect Pearls™ provide.
Here I’ve used Tim Holtz™ Adirondack® Color Wash™ for a really easy card. Such rich colors.
With added color from Adirondack® Dye Ink Pads, Color Wash™ clean-up from the card above was the foundation for this journal. Below, you can see how I incorporated mulberry paper to finish the inside cover.
I found one more use for Color Wash™ in this butterfly paper casting.
Details for constructing these cards are on pages 98-99. With a little imagination, I’m sure you’ll think of other uses for this inexpensive find.
I think that my favorite is this embossed card using Nick Bantock™ Dye Pads. I wish that you could see the beautiful sheen that the Perfect Pearls™ provide.
Here I’ve used Tim Holtz™ Adirondack® Color Wash™ for a really easy card. Such rich colors.
With added color from Adirondack® Dye Ink Pads, Color Wash™ clean-up from the card above was the foundation for this journal. Below, you can see how I incorporated mulberry paper to finish the inside cover.
I found one more use for Color Wash™ in this butterfly paper casting.
Details for constructing these cards are on pages 98-99. With a little imagination, I’m sure you’ll think of other uses for this inexpensive find.
December 12, 2008
Better Backgrounds: Texture Plates
It’s a game that I’ve always enjoyed playing, and you may too. When you look at tools, do you brainstorm about ways to use them - other than the intended purpose?
Whether it is a matter of stretching your dollars or simply challenging yourself to think “outside the box,” tools provide inspiration. While texture plates are designed to emboss paper, I’ve found it is even more fun to create backgrounds by stamping with them. Four recent creations are featured in my “Better Backgrounds” column on pages 92 – 93 of the February 2009 issue of Crafts ‘n Things. You may choose to complete your card with stamping, stickers, or transparency or decide to leave it unadorned. Whatever you decide, Tim Holtz™ Adirondack® Color Wash™, Inkssentials™ Gloss Paper, and a texture plate are all you need for striking results!
Color Confusion (above): Texture plate (Sizzix) Wild Dashes
Birds of a Feather (above): Texture plate (Fiskars) Lace; Transparency (Prima) Paintables ERA
It’s a Bug’s Life (above): Texture plate (Cedar Canyon) Op Art; E-Z Rub-On (Royal & Langnickel) Creepy Crawly Bugs Glitter
Optical Illusion (above): Texture plate (Cedar Canyon) Op Art; Stamp (Stampabilities) Thanks
Be sure to check the April issue of Crafts ‘n Things to see my next “Better Backgrounds” column.
Whether it is a matter of stretching your dollars or simply challenging yourself to think “outside the box,” tools provide inspiration. While texture plates are designed to emboss paper, I’ve found it is even more fun to create backgrounds by stamping with them. Four recent creations are featured in my “Better Backgrounds” column on pages 92 – 93 of the February 2009 issue of Crafts ‘n Things. You may choose to complete your card with stamping, stickers, or transparency or decide to leave it unadorned. Whatever you decide, Tim Holtz™ Adirondack® Color Wash™, Inkssentials™ Gloss Paper, and a texture plate are all you need for striking results!
Color Confusion (above): Texture plate (Sizzix) Wild Dashes
Birds of a Feather (above): Texture plate (Fiskars) Lace; Transparency (Prima) Paintables ERA
It’s a Bug’s Life (above): Texture plate (Cedar Canyon) Op Art; E-Z Rub-On (Royal & Langnickel) Creepy Crawly Bugs Glitter
Optical Illusion (above): Texture plate (Cedar Canyon) Op Art; Stamp (Stampabilities) Thanks
Be sure to check the April issue of Crafts ‘n Things to see my next “Better Backgrounds” column.
June 22, 2008
Hotel Labels ATC Album
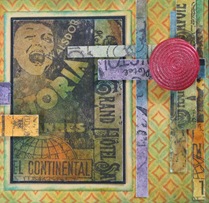
I like to make books but rarely use them. Generally for me, it's the process rather than the outcome, so this is a change: a project I'm really using. I've been looking forward to its publication in the August 2008 issue of Crafts 'n Things so that I could share detailed pictures.
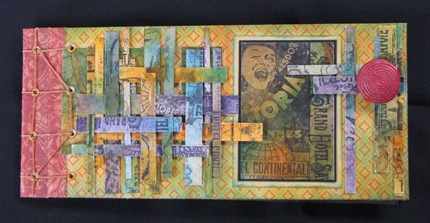
With patterned paper as a foundation for the cover (Bo-Bunny Press Shabby Princess Collection,) take a closer look at this twist on a traditional book binding technique.
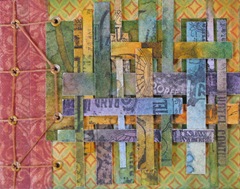
The ATCs on the cover and inside used one stamp, the Tim Holtz Hotel Collage (Stampers Anonymous.) Of course, I used some of my favorite Ranger products: Adirondack® Color Wash™, Tim Holtz™ Distress Ink Pads, and Archival™ Ink. I used Melt Art™ Mold n' Pour™, my Melting Pot®, Melt Art™ UTEE Brightz™, and Perfect Pearls™ to create the fuchsia embellishment. I think this is the perfect touch.
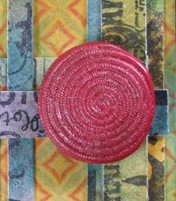
Inside the book, you'll find a dozen ATCs made with the same stamp. (I find it a challenge to navigate the Stampers Anonymous catalog. Check out page 9 in the Winter 2008 Supplement 8.2 to see how versatile the image is.)
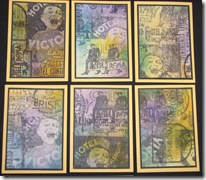
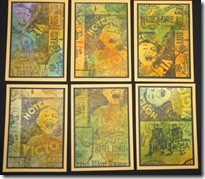
For detailed instructions, check out the August 2008 issue of Crafts 'n Things.
With patterned paper as a foundation for the cover (Bo-Bunny Press Shabby Princess Collection,) take a closer look at this twist on a traditional book binding technique.

The ATCs on the cover and inside used one stamp, the Tim Holtz Hotel Collage (Stampers Anonymous.) Of course, I used some of my favorite Ranger products: Adirondack® Color Wash™, Tim Holtz™ Distress Ink Pads, and Archival™ Ink. I used Melt Art™ Mold n' Pour™, my Melting Pot®, Melt Art™ UTEE Brightz™, and Perfect Pearls™ to create the fuchsia embellishment. I think this is the perfect touch.
Inside the book, you'll find a dozen ATCs made with the same stamp. (I find it a challenge to navigate the Stampers Anonymous catalog. Check out page 9 in the Winter 2008 Supplement 8.2 to see how versatile the image is.)
For detailed instructions, check out the August 2008 issue of Crafts 'n Things.
May 18, 2008
Faux Encaustic Magic
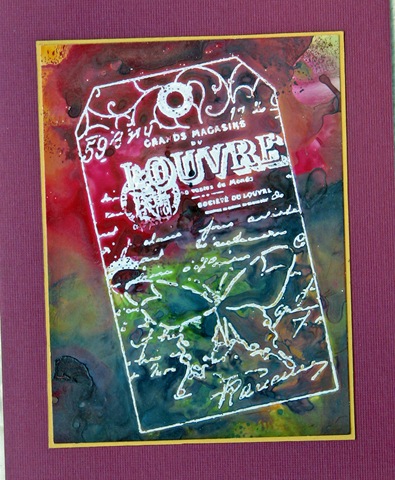
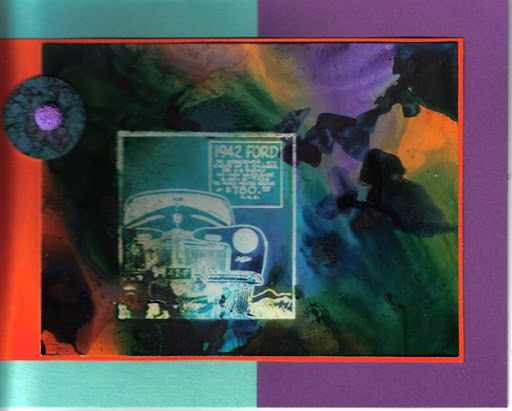
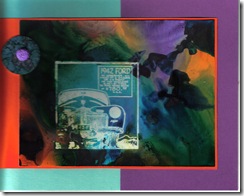
Encaustic painting has long held a fascination for me. When I discovered how to emulate this effect with Adirondack Color Wash, I was thrilled. You'll find detailed instructions for these cards in the June 2008 issue of Crafts 'n Things. You'll be amazed at how easy it is to get fabulous results.
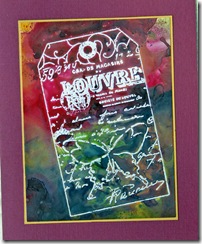
Stamps: Car Cube 1942 Ford by B Line Designs; Societe du Louvre by Just for Fun
April 4, 2008
On the First Day of Christmas
I remember singing this song as a child - holding the note for "five golden rings" then singing faster and faster as I counted down to the "partridge in a pear tree." I never had a problem remembering the first five items, but I've always gotten confused with the numbers that go with maids a milkin' and lords a leapin'. When I found the "Days of Christmas" cubes by Stampington, I looked forward to creating a Christmas keepsake (2007 November Rubber Stamper) to help me keep the days straight.
From the beginning, I envisioned a monochromatic project in shades of aqua.When I saw a black plastic frame with 12 small openings at the dollar store, I knew that I'd found the perfect format.

First, I painted the frame with Ranger Adirondack Aqua Paint Dabber and edged with Stream Paint Dabber. The veins (Pool Paint Dabber) and crackle (Stream Paint Dabber) were stamped with the Stampendous Faux Finish Quad Cube. I sprayed inexpensive white bridal flowers and leaves with a Ranger Inkssentials Mini Mister filled with 1/3 Ranger Adirondack Stream Color Wash to 2/3 water.
To create the background paper for stamping, I misted watercolor paper to dampen and stamped the Stampendous Marble Texture Cube with Ranger Adirondack Aqua and Pool Ink misting to blend the colors. I then stamped the images with Ranger Adirondack Stream Ink and embossed with Ranger Super Fine Detail Clear Powder. I used my waterbrush to add color to the images misting to blend and mute the colors for a subtle effect. The center section was created in the same manner with Bring Roses (PSX) and Lace Corner (Stampabilities.) You can see the detail here.

"Love" and "gave to me" (Hero Arts Artistic Lowercase & Uppercase Alphabets) were stamped on a transparency with Ranger Big & Bossy Clear Ink and embossed with Ranger Turquoise Embossing Powder. "My" was stamped and embossed on watercolor paper then attached to an acrylic circle tag. "True" was die cut with the QuicKutz Maddie Anne alphabet and edged with a Ranger Adirondack Pigment Stream Pen.
This inexpensive project - less than $2 - is the perfect reminder of Christmas past and a carefree childhood.
From the beginning, I envisioned a monochromatic project in shades of aqua.When I saw a black plastic frame with 12 small openings at the dollar store, I knew that I'd found the perfect format.

First, I painted the frame with Ranger Adirondack Aqua Paint Dabber and edged with Stream Paint Dabber. The veins (Pool Paint Dabber) and crackle (Stream Paint Dabber) were stamped with the Stampendous Faux Finish Quad Cube. I sprayed inexpensive white bridal flowers and leaves with a Ranger Inkssentials Mini Mister filled with 1/3 Ranger Adirondack Stream Color Wash to 2/3 water.
To create the background paper for stamping, I misted watercolor paper to dampen and stamped the Stampendous Marble Texture Cube with Ranger Adirondack Aqua and Pool Ink misting to blend the colors. I then stamped the images with Ranger Adirondack Stream Ink and embossed with Ranger Super Fine Detail Clear Powder. I used my waterbrush to add color to the images misting to blend and mute the colors for a subtle effect. The center section was created in the same manner with Bring Roses (PSX) and Lace Corner (Stampabilities.) You can see the detail here.

"Love" and "gave to me" (Hero Arts Artistic Lowercase & Uppercase Alphabets) were stamped on a transparency with Ranger Big & Bossy Clear Ink and embossed with Ranger Turquoise Embossing Powder. "My" was stamped and embossed on watercolor paper then attached to an acrylic circle tag. "True" was die cut with the QuicKutz Maddie Anne alphabet and edged with a Ranger Adirondack Pigment Stream Pen.
This inexpensive project - less than $2 - is the perfect reminder of Christmas past and a carefree childhood.
March 30, 2008
30 Second Backgrounds
This was one of those serendipity moments. I'd been working with Ranger's Adirondack Color Wash all afternoon. Normally, I mist my craft sheet with water and clean up by making additional background pages. After making a stack of extra backgrounds, I cleaned the craft sheet with a paper towel.
I decided to try stamping on glossy paper with the wet paper towel. The results were unbelievable. The texture of the towel and the brilliant colors transferred to paper creating a stunning background in less than 30 seconds. In January 2007, the Rubber Stamper featured these five cards using this technique. I stamped all images with Ranger Archival Ink.

I used these stamps:
Here are two additional cards that include images from Suze Weinberg Instant Art book. “SECRET” is stamped with the Postmodern Design Reverse Block Alphabet. “Live, Laugh, Love” is by American Art Stamp.

Heat set your backgrounds for the best results. You'll still be under 30 seconds. That's what I call fast!
I decided to try stamping on glossy paper with the wet paper towel. The results were unbelievable. The texture of the towel and the brilliant colors transferred to paper creating a stunning background in less than 30 seconds. In January 2007, the Rubber Stamper featured these five cards using this technique. I stamped all images with Ranger Archival Ink.

I used these stamps:
- Chocolate: Afternoon Tea by Oxford Impressions
- Strength of a Tree: Oak Branch by Stampscapes; Strength by Custer’s Last Stamp
- Memories Are Forever: Memories Are Forever by Limited Edition
- Eyes for You: Shaving Mug by Artful Legacy; Eyes by 100 Proof Press; Harlequin Diamonds by Post Modern Design; Old Writing by Hero Arts; Thank You by Stampabilities
- Forest Sunrise and Stream: Forest Sunrise and Stream, Bush, and Sedge Filler by Northwoods
Here are two additional cards that include images from Suze Weinberg Instant Art book. “SECRET” is stamped with the Postmodern Design Reverse Block Alphabet. “Live, Laugh, Love” is by American Art Stamp.

Heat set your backgrounds for the best results. You'll still be under 30 seconds. That's what I call fast!
Subscribe to:
Posts (Atom)