When Suzanne Melvin of Oxford Impressions first clued me in that Disney's Alice in Wonderland would be released this month, I had a perfect excuse. Now, I had seen stamps before based on the illustrations by Sir John Tenniel from my childhood edition of the book, but I'd always resisted. That is until I saw the three new sets Suzanne recently released: Classic Alice (the one I've used here,) Illustrated Alice, and Wonderland. Projects for the April 2010 issue of Crafts 'n Things provided the perfect excuse for me to add these stamps to my collection. See what you think.
First, a spiral notebook: black and white with an accent of red. An easy look to accomplish with Archival™ Ink, Adirondack® Dye Ink, and Inkssentials™ Glossy Accents™. When the self-adhesive crystals (Prima Marketing ®) were not the color I wanted, that too was a quick change with Tim Holtz™ Adirondack® Alcohol Inks.
 Next, an Alice pendant. Same basic supplies but a totally different look.
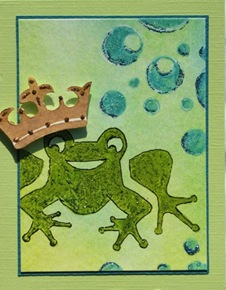
 Finally, a card. Alice with an attitude. Could that be caused by the Stickles™ Glitter Glue crown?
 Fun stamps and fun projects. For additional details, see pages 48-49 of the April 2010 issue of Crafts 'n Things.
I might as well admit it before someone asks.
No, the "Fairyland" box and the close-up of the lid are not the same. I thought it was packed carefully, but the elephant that must have stomped on the box crushed the wings on my precious fairy. I only redid the lid, and it turned out a little differently from, my original submission. To find pictures that match, you'll need to look in the August issue of Crafts 'n Things. Here's the original box.
 Now for a closer view. Actually, I think that I like the new lid better than the first. (Next time that I go to the post office, I'll have to thank that elephant!) I never cease to be amazed at how simple charms and buttons can be used with Melt Art™ Mold-n-Pour® to form a mold for Ultra Thick Embossing Enamel™. I added highlights with Perfect Pearls™ and Stickles™ Glitter Glue.
 My second altered paper Mache creation was this "Dragonfly Delight" box. Look closely and what appear to be openings in the metal lid are actually cut-outs lined with mesh wire. Coordinating colors of Tim Holtz™ Adirondack® Alcohol Inks, Adirondack® Acrylic Paint Dabbers, and Adirondack® Pigment Inks made this a quick and easy project to finish. If you're wondering about the texture on the sides of the box, that's one of my favorite stamps, the bark stamp from the Grunge Background set by I Brake for Stamps.
 You can find complete directions for these projects on page 90 in the August issue of Crafts 'n Things.
In the December 2008 issue of Crafts ‘n Things, I had two projects using foam stamps: the first, a tray in which a large stylized leaf and a circle stamp were turned into vibrant poinsettias, and the second, a set of holiday cards. In the April 2009 issue, you’ll find four more cards that prove that foam stamps can be sophisticated or just plain fun.
Once again, I’ve used some of my favorite supplies – Adirondack® Acrylic Paint Dabbers (and Adirondack® Metallics Acrylic Paint Dabbers,) Adirondack® Dye Ink Pads, Perfect Pearls™, and Stickles™ Glitter Glue. The foam stamp transformation is made complete with an Inkssentials™ White Opaque Pen and a black pen (Pitt Artist.) For more information on how to “Step Up Your Stamping with Foam Stamps,” check out my article on pages 78 – 79, and you too will join the glitz, glitter craze!


The tray had been a fixture on our porch for years, and the once rich finish showed the effects of constant exposure to the elements. When Crafts 'n Things editor Dawn Gehring suggested a Christmas home decor project, I knew this was the perfect project to repurpose a favorite piece. You'll have to check the December 2008 issue to see the tray itself, but a few swipes of Espresso paint with an Adirondack® Acrylic Paint Dabber gave the tray new life.
I envisioned big, bold flowers and leaves. Since the poinsettia stamps that I had on hand were not the size that I wanted, I turned to large foam leaf and circle stamps to create the images that I envisioned. As with the foam stamp Christmas cards, I used Adirondack® Acrylic Paint Dabbers and Adirondack® Metallic Acrylic Paint Dabbers to mix my paints right on the stamps. I believe I achieved the bold look that I had in mind!
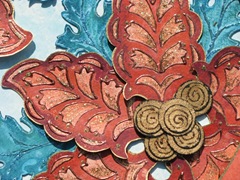
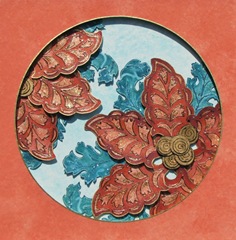 Now for a closer look. When I think of Christmas, I think of glitter and glitz, and the fun part of the project was adding those details. Adirondack® Dimensional Pearls, Stickles™ Glitter Glue, and Perfect Pearls™ pack a glamour punch and the Inkssentials™ White Opaque Pen adds subtle accents.
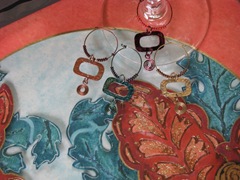
 As for the glass charms, Tim Holtz™ Adirondack® Alcohol Inks and Metallic Mixatives quickly transformed jewelry findings into coordinating pieces. Rather sophisticated if I do say so.
 For additional details, see pages 52-53 in the December 2008 issue of Crafts 'n Things.
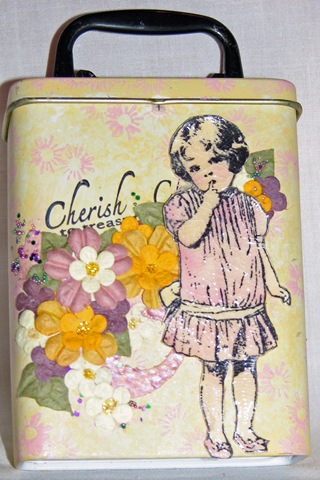
If you agreed with my "gaudy cute" assessment of the glitzy orange and purple ATC holder in the prior post, I'm sure that you'll find "Betty" one of the sweetest little girls you've ever seen. ("Betty" and the "Cherish" sentiment are both stamps by B Line Designs.) This tin was a featured ATC holder in the April 2008 issue of Crafts 'n Things.
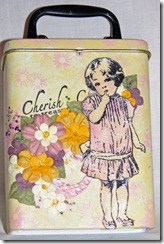 Check out the details on page 65 of how I used Adirondack Acrylic Paint Dabbers, Adirondack Dye Ink Pads, Stickles Glitter Glue, Inkssentials Crackle Accents, Perfect Pearls, and Suze Weinberg's Beadazzles to make one sweet container for your ATCs.
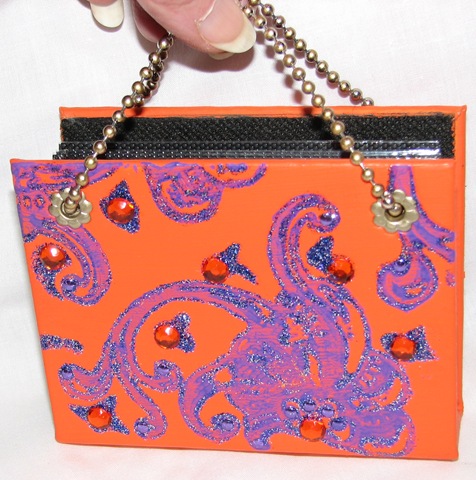
I'm afraid that my photo doesn't adequately show the details of this ATC holder. (That's my hand in the picture, and I couldn't hold the chain and get the right angle to spotlight the glitz at the same time.) When I finished this project, my evaluation was "gaudy cute." You'll find a better picture on page 65 in the April 2008 issue of Crafts 'n Things.
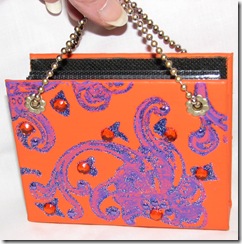 After purchasing a mini album from the dollar bin at the craft store, I realized it was the perfect size for ATC storage. All it took was Adirondack Acrylic Paint Dabbers, Swirly Element by Postmodern Design, Stickles Glitter Glue, and jewels for added bling. By adding the hibiscus eyelets and ball chain that I colored to match with Adirondack Alcohol Metallic Gold Mixative, the mini album was transformed into a little purse, the perfect size for transporting ATCs. Check out the details to make your own "gaudy cute" holder in Crafts 'n Things.